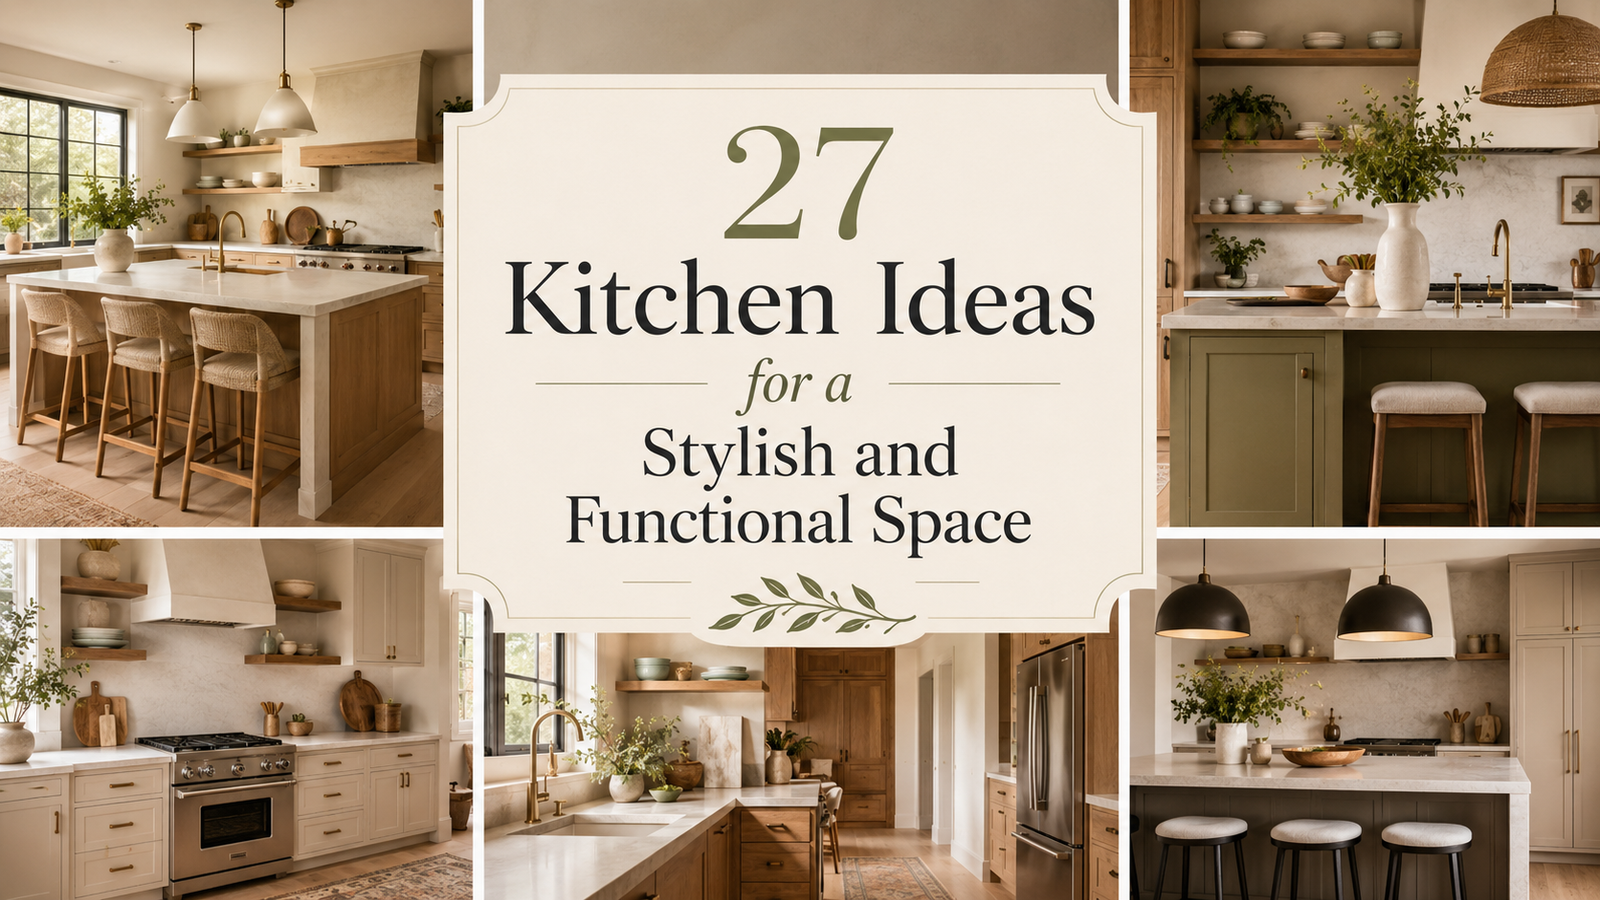
27 Kitchen Ideas for a Stylish and Functional Space
A kitchen can look beautiful in photos and still be frustrating to use every single day. The counter gets crowded, pans are stacked three deep, the toaster never seems to have a proper home, and one awkward cabinet somehow collects everything you do not know where to put.
That is why the best kitchen ideas for a stylish and functional space are not just about choosing pretty finishes. The room has to work when groceries come in, dinner is half cooked, someone is opening the fridge, and there are dishes waiting by the sink.
Small layout choices often matter as much as the big ones. A deeper drawer can fix a storage problem. Better task lighting can make food prep easier. Even the way an island is planned can give you seating, storage, and a cleaner-looking room at the same time.
These ideas focus on changes that make a kitchen feel considered without making it fussy. Some are renovation-level upgrades, while others can be borrowed for a smaller refresh.
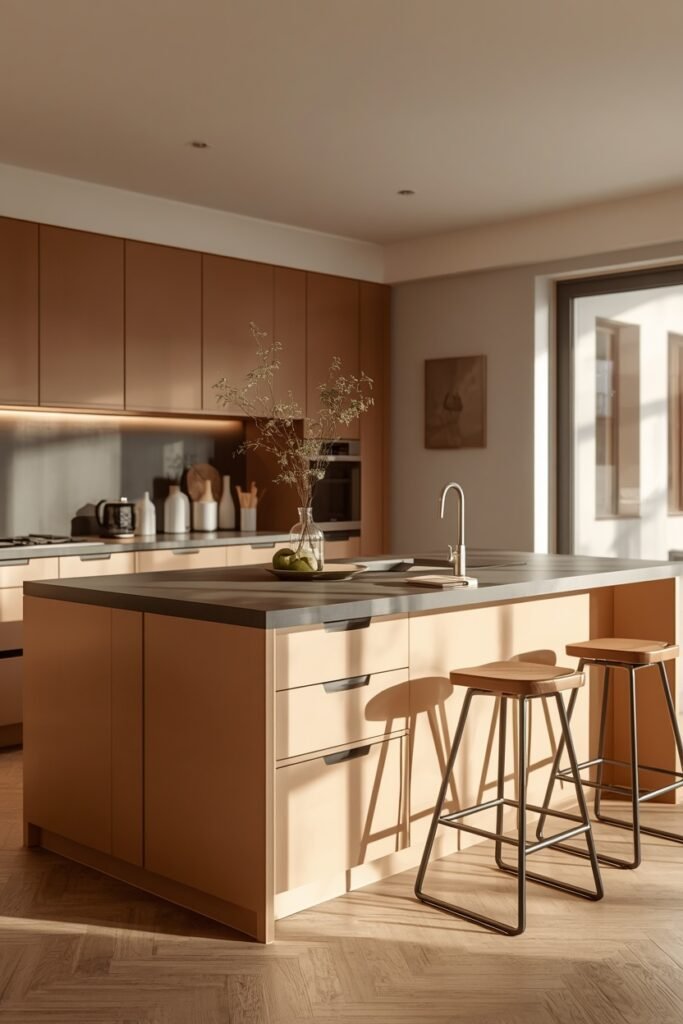
1. Create a Hardworking Kitchen Island With Storage on Both Sides
A kitchen island earns its footprint when it does more than provide another countertop.
Instead of putting cabinets only on the working side, use the outer side for shallower storage. That space can hold serving platters, table linens, cake stands, extra glasses, or the appliances you use once a month.
Keep the things needed for cooking facing the main work zone. Less-used items can face the dining or seating side.
A useful setup might include:
- Deep drawers near the cooktop
- Shallow cupboards below the stools
- An outlet for small appliances
- A clear stretch of counter for prep
That way, the island supports everyday cooking without becoming one oversized surface where mail and grocery bags collect.
2. Run Cabinets to the Ceiling to Use the Space You Already Have
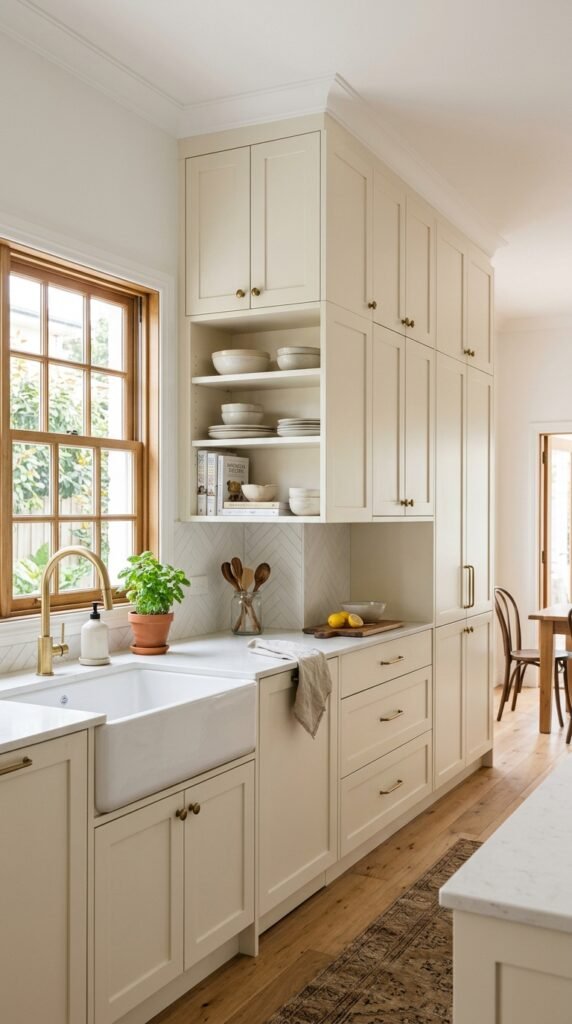
That dusty strip above standard-height cabinets rarely does much for a kitchen.
Extending cabinetry upward gives the room a taller, more finished look while creating storage for things that do not need to be grabbed every day. Think holiday dishes, oversized serving bowls, spare pantry containers, or the fondue set that appears twice a year.
The key is deciding what belongs high up.
Keep daily mugs, plates, and pantry basics within easy reach. Reserve the top cabinets for lighter, less-used pieces so you are not climbing onto a stool every morning.
In a smaller kitchen, matching the upper cabinetry to the wall color can also make the extra height feel calmer rather than bulky.
💡 Quick Tip
Put rarely used, lightweight items in the highest cabinets. Heavy cookware is safer and easier to manage in lower drawers or cupboards.
3. Add Deep Drawers Where Pots and Pans Usually Pile Up
The lower cabinet with a stack of frying pans is often one of the most annoying spots in the kitchen. You pull out one pan and three lids move with it.
Deep drawers fix that problem because you can see almost everything from above.
Use them for:
- Pots and saucepans
- Frying pans and lids
- Mixing bowls or food containers
Wide drawers near the range are especially handy since the cookware stays close to where it is used.
Drawer dividers or simple peg systems can stop larger pieces from sliding around, but they are not essential. Even an open deep drawer is usually easier to manage than a dark cabinet where cookware disappears into the back.
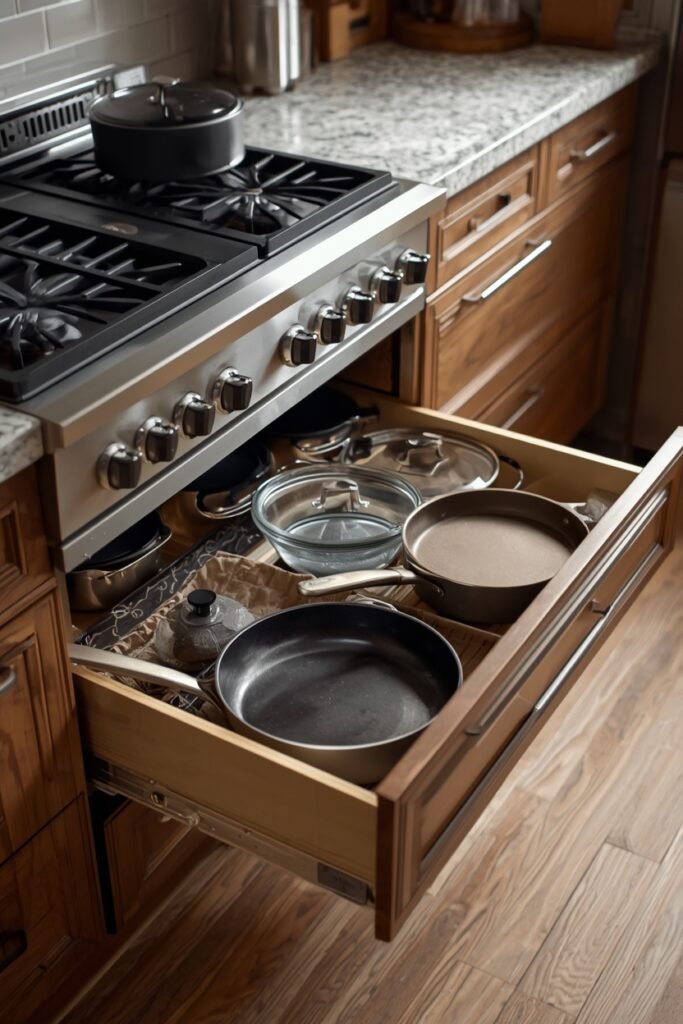
Pans sit behind one another, lids fall sideways, and reaching the back means unloading half the cabinet.
Cookware is visible from above, easier to lift out, and simpler to return to the right spot.
4. Use Pendant Lights to Give the Island a Clear Focal Point
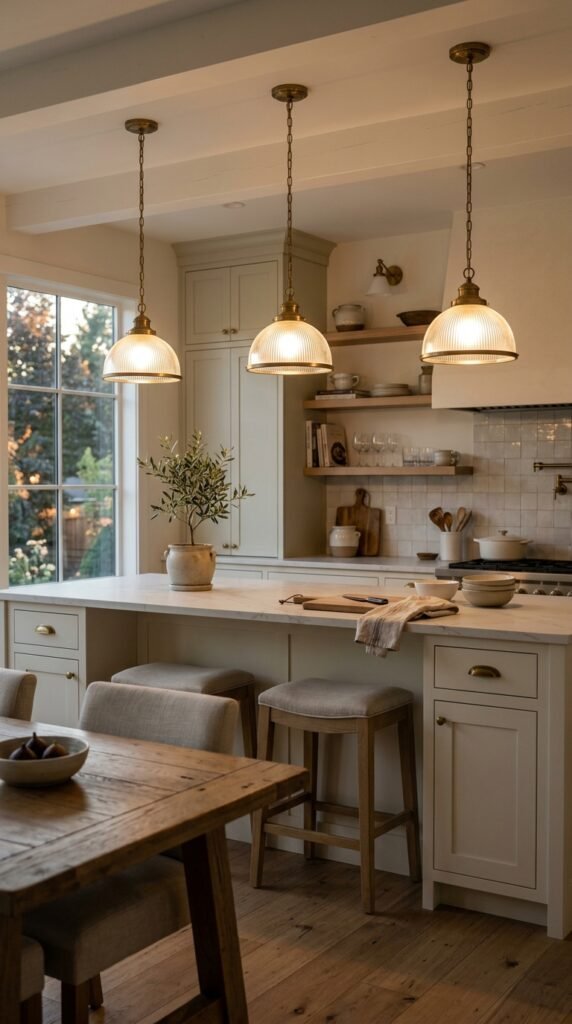
Good island lighting has two jobs. It needs to help you see the chopping board, and it should visually anchor the middle of the room.
For a long island, two or three pendants usually read more intentionally than several tiny fixtures scattered across the ceiling. Keep their scale in proportion to the island so they do not look lost.
There is also no rule that pendants have to be dramatic.
A simple glass shade keeps sight lines open. A metal fixture adds more definition. A softer fabric or woven shade can work where the kitchen opens into a relaxed dining area.
Before buying, check the fixture from the seated side too. A shade that looks small in a showroom can feel surprisingly low once someone is sitting beneath it.
| Open, Airy Look | Stronger Focal Point |
|---|---|
| Clear or lightly tinted glass shades | Solid metal or sculptural shades |
| Useful where sight lines matter | Useful in a large kitchen that needs visual weight |
| Lets other finishes take attention | Can become a defining decorative feature |
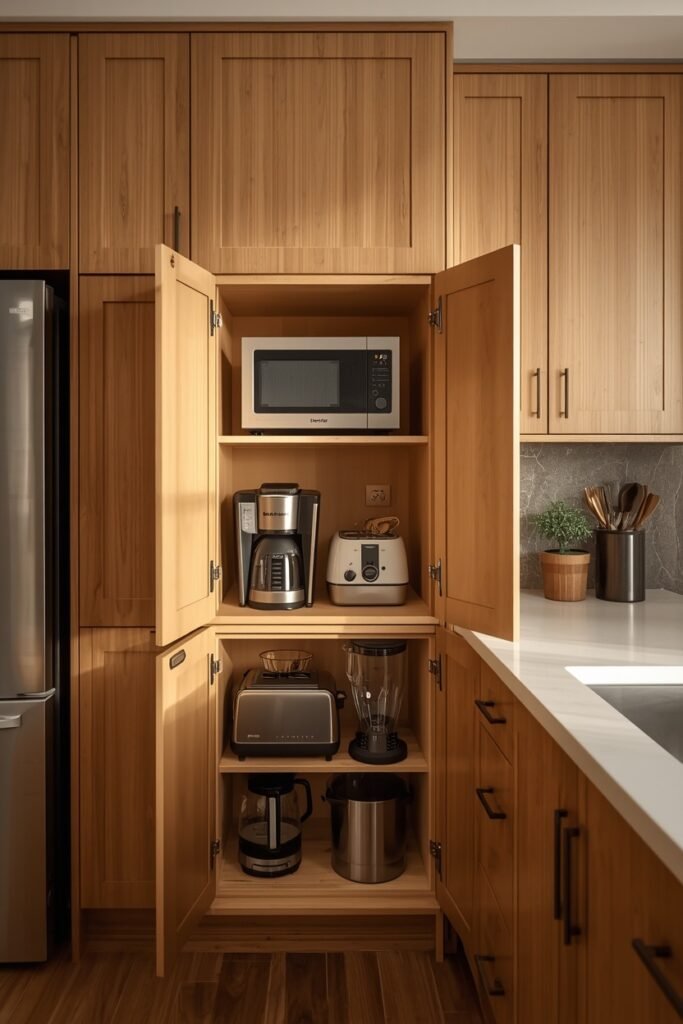
5. Build a Small Appliance Garage to Clear the Countertop
Coffee makers, blenders, toasters, and mixers are useful, but a row of them can quickly make a generous counter feel cramped.
An appliance garage gives those everyday machines a proper place without making them inconvenient to use. It can sit at the end of a cabinet run, inside a tall pantry unit, or directly on the countertop behind a lift-up or pocket-style door.
The best candidates are appliances you use often enough to keep plugged in.
Think coffee setup, toaster, kettle, or blender.
Less-used equipment can still live in a deeper pantry cabinet. The goal is not to hide every appliance. It is to keep the busiest stretch of counter open for chopping, serving, and putting down grocery bags.
6. Mix Closed Cabinets With One Small Area of Open Shelving
A full wall of open shelves can look light in a styled photo, but it also puts every mug, bowl, and stray packet on display.
A smaller section is usually easier to live with.
Keep most storage behind closed doors, then use one or two shelves for the things that naturally stay neat. Everyday glasses, a stack of white bowls, a few cookbooks, or a small vase work well because they are easy to reset after use.
Good spots include:
- Beside a window
- At the end of an upper cabinet run
- Above a coffee station
- Over a short stretch of counter that needs less visual weight
The shelf should feel useful first. If it needs constant styling to look good, it is probably doing too much.
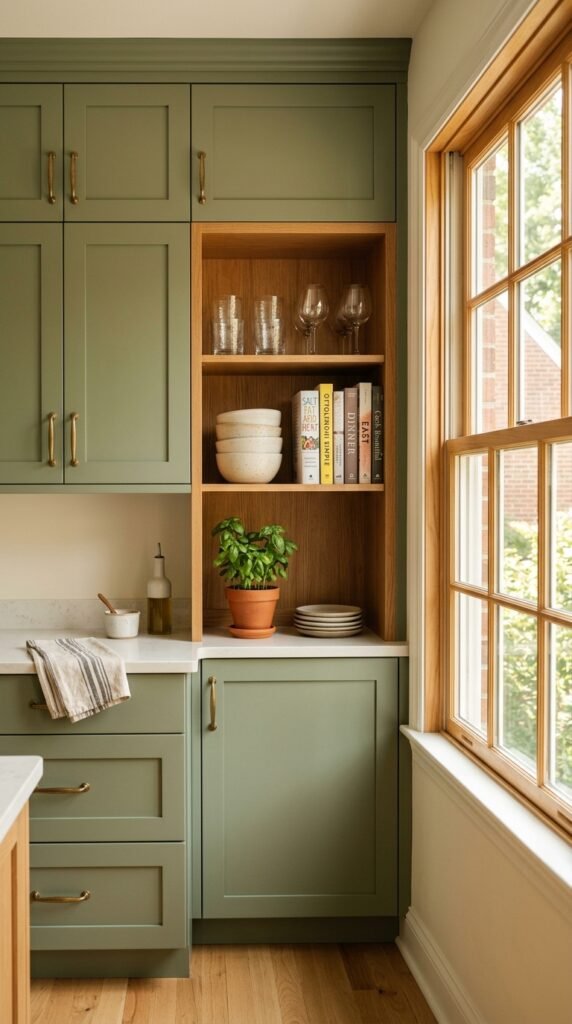
What works well on open shelves
7. Choose a Full Height Backsplash for a Cleaner, More Finished Look
Stopping tile a few inches above the counter can leave a kitchen wall feeling chopped into separate pieces.
Running the backsplash higher creates a calmer visual line, especially behind the range or sink. It also gives you more wipeable surface in places where splashes happen most.
You do not have to tile every wall.
A simple approach is to take the backsplash up to the underside of the upper cabinets, then carry it higher only where there are no cabinets. Behind a range hood, the same material can run all the way up and become a quiet focal point.
Large-format tile, slab stone, or simple rectangular tile all work. The important part is continuity rather than choosing the busiest pattern.
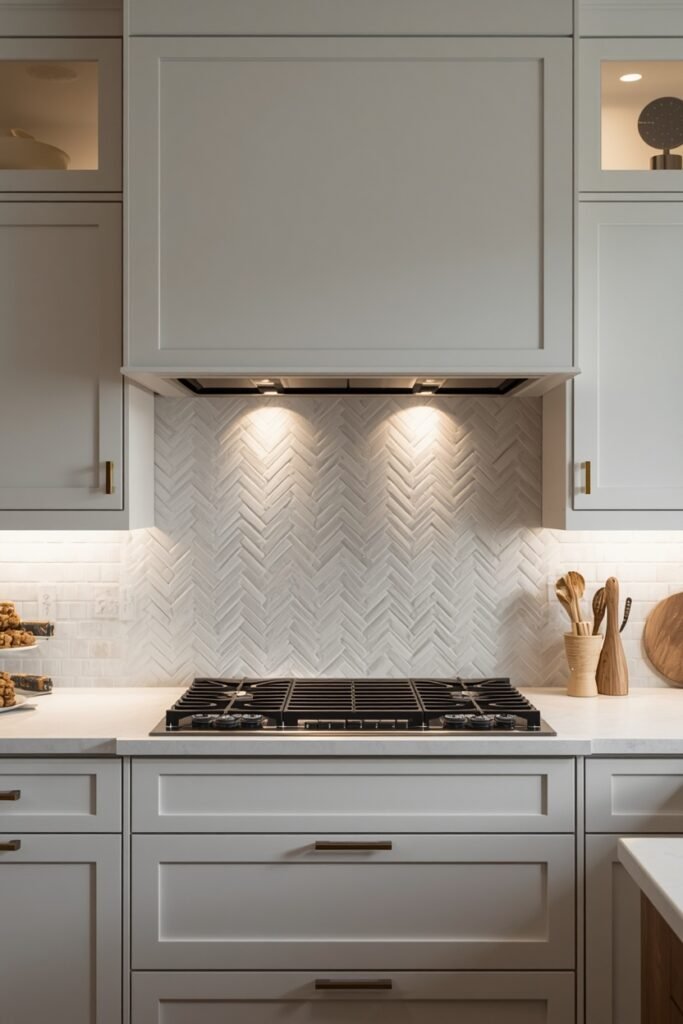
A backsplash usually looks more intentional when its stopping point follows a clear architectural line, such as the cabinets, range hood, or ceiling.
8. Add a Pull Out Pantry Beside the Fridge for Narrow Storage
That skinny strip beside a refrigerator can be more useful than it looks.
A narrow pull out pantry works well for bottles, spices, oils, canned food, snack packets, or baking supplies. Because the whole unit slides forward, you can see what is hiding at the back instead of reaching into a deep, narrow cupboard.
Before planning one, sort the items you actually want to keep there.
A simple setup is:
- Put taller bottles on the lower shelves.
- Keep everyday sauces and tins around waist height.
- Use upper shelves for lighter backup items.
Avoid filling every shelf to the edge. A little breathing room makes it easier to see what needs replacing and stops small packets from disappearing behind larger containers.
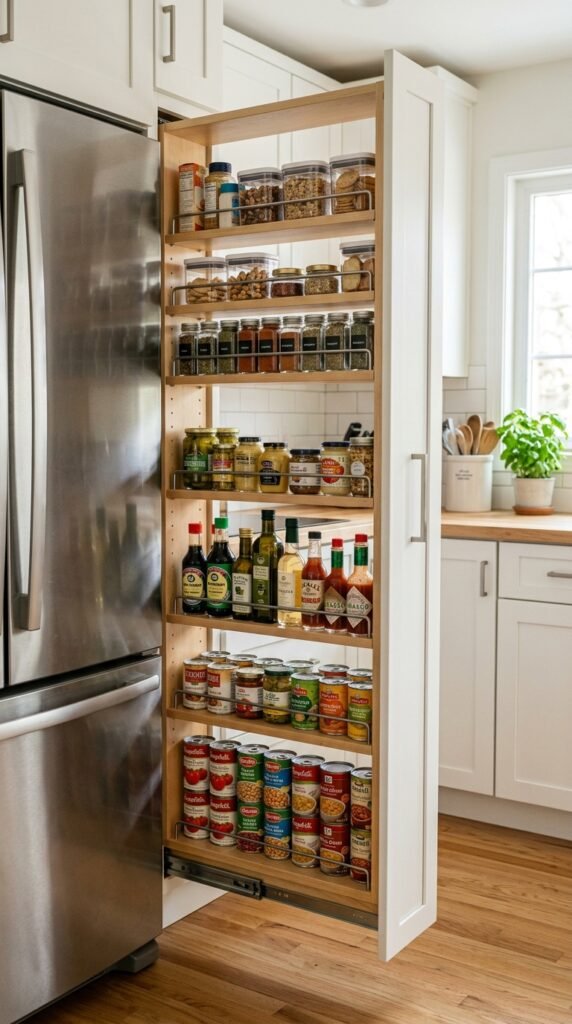
Measure the usable gap and check that the pull out will not block the refrigerator door.
Group stored items by height so shelf spacing matches what you actually buy.
Keep the heaviest items low so the pantry is easier to pull out and reload.
9. Use Two Cabinet Colors to Break Up a Large Kitchen
Two-tone cabinetry works best when the color change has a reason.
A common mistake is scattering two finishes around the room without any clear pattern. That can make the kitchen feel busier than it needs to.
Instead, give each color a job.
Use the darker or stronger finish on the island, lower cabinets, or one tall cabinet wall. Keep the lighter finish on upper cabinets so the eye still has somewhere to rest.
Wood also counts as a second cabinet tone. A painted perimeter with a warm wood island can feel softer than introducing another paint color.
The safest rule is to keep large connected cabinet runs consistent rather than switching colors halfway through them.
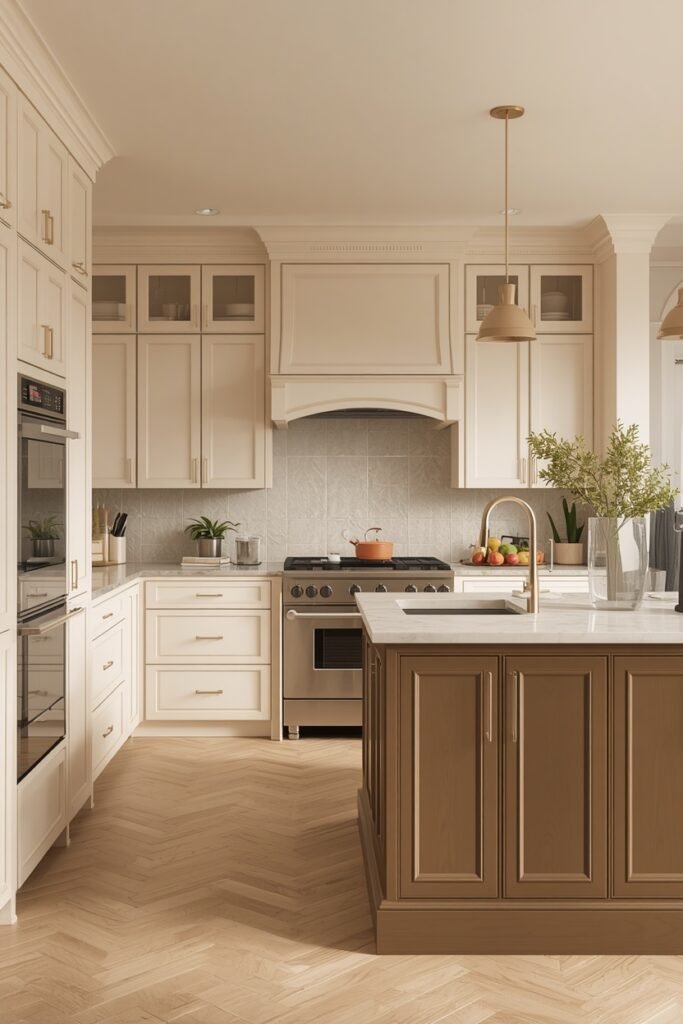
Assign one color to a clear zone, such as the island or lower cabinets.
Repeat nearby wood or metal tones so the two finishes feel connected.
Do not alternate colors from cabinet to cabinet.
Avoid adding a third strong finish unless the room already has a very simple palette.
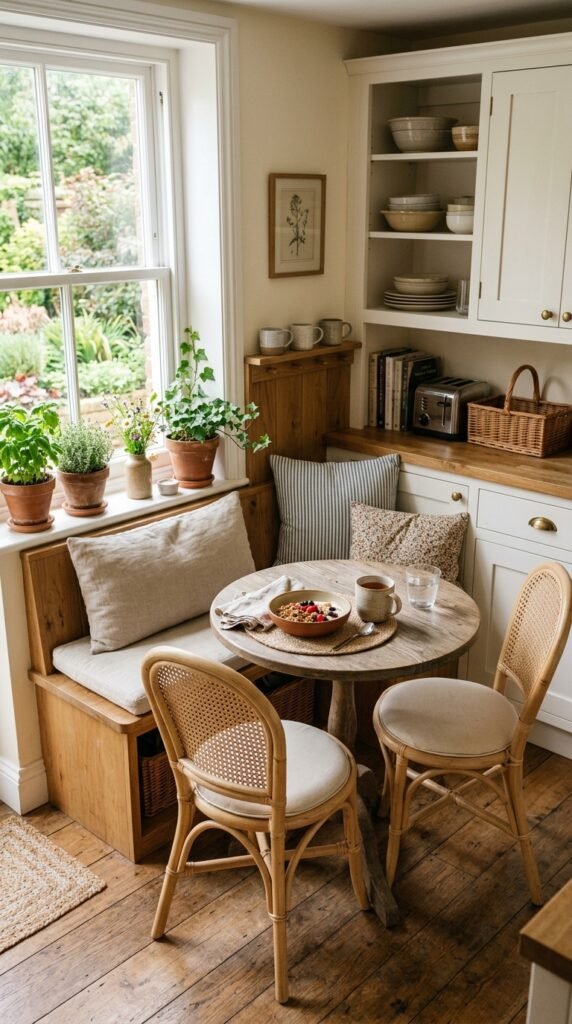
10. Turn an Empty Corner Into a Compact Breakfast Nook
A kitchen corner does not need much space to become useful seating.
A small bench against the wall, a compact table, and two lightweight chairs can turn an unused spot into somewhere for coffee, homework, or quick meals. Built-in seating is helpful when floor space is tight because the bench can sit flush to the wall instead of needing clearance behind every chair.
Storage underneath is a bonus, but keep it for things you do not reach for daily.
Think spare table linens, serving trays, or seasonal pieces rather than the cereal bowls used every morning.
Choose a table with rounded corners if the walkway is narrow. It is a small detail, but it makes moving around the nook much easier when chairs are pulled out.
📌 Good To Know
Before adding a nook, pull the chairs out to the position they would be in during a meal. Make sure the main kitchen walkway still feels comfortable with someone seated.
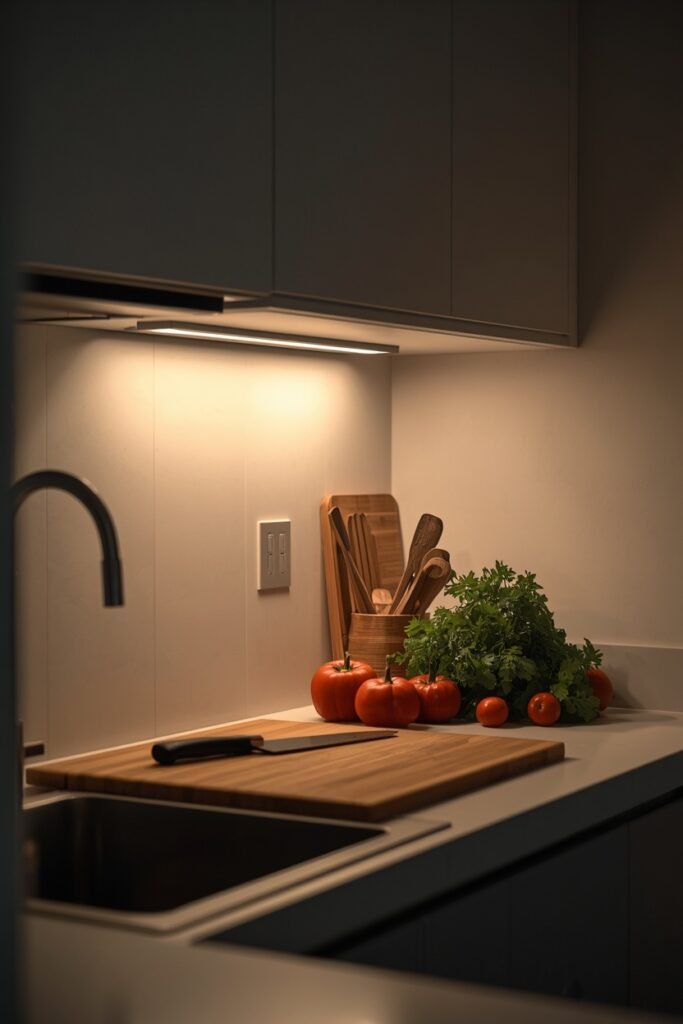
11. Install Under Cabinet Lighting Where You Actually Prep Food
Ceiling lights can make a kitchen feel bright while still leaving the counter in shadow.
Under cabinet lighting fixes that by putting light directly where chopping, measuring, and food prep happen. It is especially useful beneath deeper upper cabinets, where overhead light often gets blocked by your own body.
Focus first on the busiest work areas:
- Beside the sink
- Near the main prep board
- Around the coffee station
- Close to the cooktop
Warm white lighting usually feels softer in a home kitchen than very cool white light.
The small detail that matters most is hiding the fixture itself. A slim light strip tucked toward the front edge of the cabinet gives better counter coverage without leaving an obvious glowing line.
12. Hide Trash and Recycling Inside a Pull Out Cabinet
A freestanding trash can usually ends up in the exact spot where someone wants to walk.
Moving trash and recycling into a pull out cabinet keeps the floor clearer and makes cleanup feel more natural. The best location is close to the main prep area or sink, where scraps and packaging already tend to collect.
Do not make the cabinet too complicated.
Two clearly separated bins are often easier to maintain than a setup with several tiny containers. Add liners, spare bags, or a small roll of compost bags nearby so changing the bin does not become another trip across the kitchen.
Before choosing a pull out system, check the cabinet opening and the height of the bins. A lid that catches every time gets irritating fast.
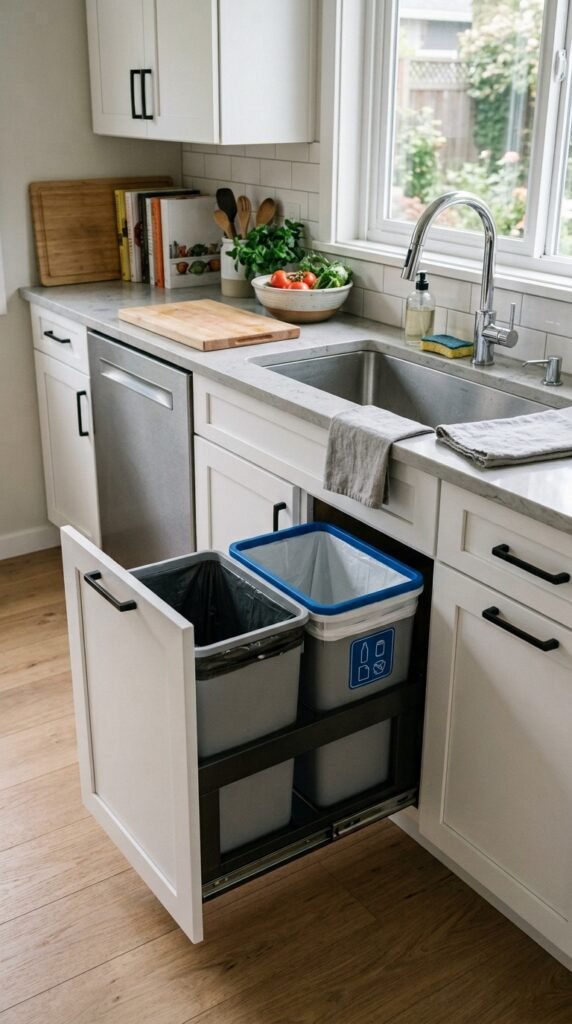
Plan the cabinet around these basics
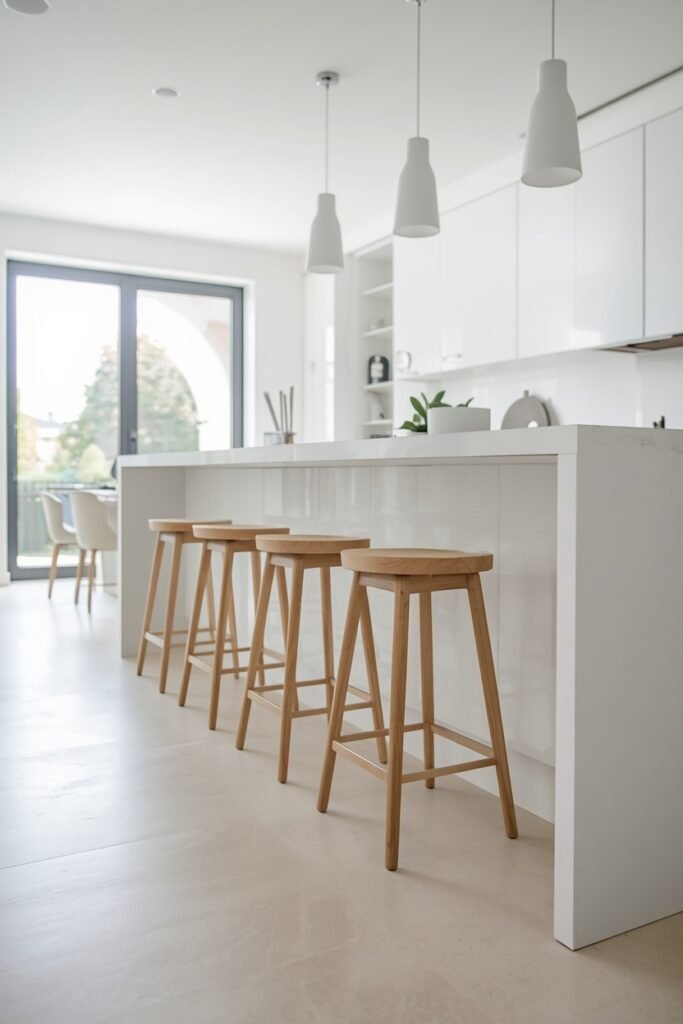
13. Choose Counter Stools That Tuck Fully Under the Island
Bulky stools can make a good kitchen island feel crowded even when nobody is sitting there.
A cleaner setup uses stools that slide almost completely beneath the counter overhang. That keeps the walkway open and makes the island look less furniture-heavy during the day.
Backless stools take up the least visual space, but low-back designs can be more comfortable without sticking out too far.
Before buying, check three things:
seat height, overall depth, and how far the legs spread.
A stool may look slim from the front while still having a deep base that blocks the aisle.
If the island is used for long breakfasts or homework, comfort matters more than shaving off every inch. For occasional seating, a compact profile usually wins.
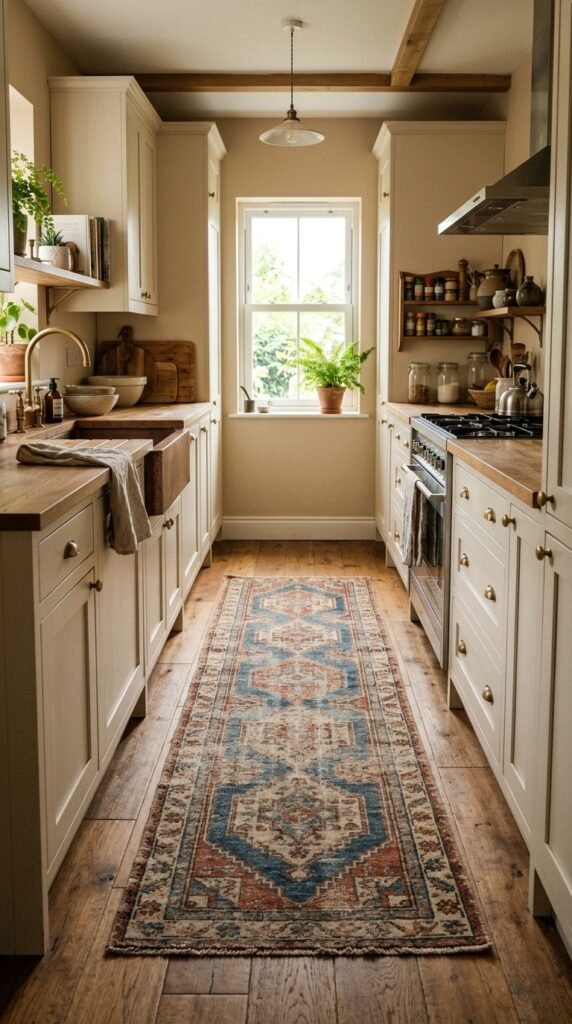
14. Use a Runner to Soften a Long Galley Kitchen
A galley kitchen can feel very hard edged when the floor, cabinets, counters, and appliances are all made from solid surfaces.
A runner adds softness without taking up usable space.
Choose one that leaves some floor visible along both sides rather than filling the passage from cabinet to cabinet. That usually looks more deliberate and makes cleaning easier around the edges.
Pattern can also be practical. A lightly mottled or woven design tends to hide the crumbs that appear five minutes after sweeping.
Look for:
- A low pile that does not catch under feet
- A washable or easy-clean material
- A nonslip backing or separate rug pad
- A length that relates to the cabinet run
Avoid thick, plush rugs near working areas. They are harder to move around on and usually collect more kitchen debris.
- ▸Choose low pile so cabinet doors and feet move freely.
- ▸Leave visible flooring at the edges for a lighter look.
- ▸Use a washable finish in areas where spills are likely.
15. Create a Coffee Station Away From the Main Cooking Zone
Morning traffic gets easier when making coffee does not require standing in the middle of the cooking area.
A coffee station can live on a short counter, inside a pantry cabinet, or at the far end of the kitchen. Group the machine, mugs, coffee, tea, sugar, and a small tray in the same zone so everything needed for a drink is within one or two steps.
The biggest benefit is separation.
Someone can make coffee while another person uses the sink or cooktop without both reaching for the same drawer.
Keep the setup compact. A coffee corner quickly starts looking cluttered when every syrup bottle and spare mug stays on display.
Store refills above or below the counter and leave only the daily essentials out.
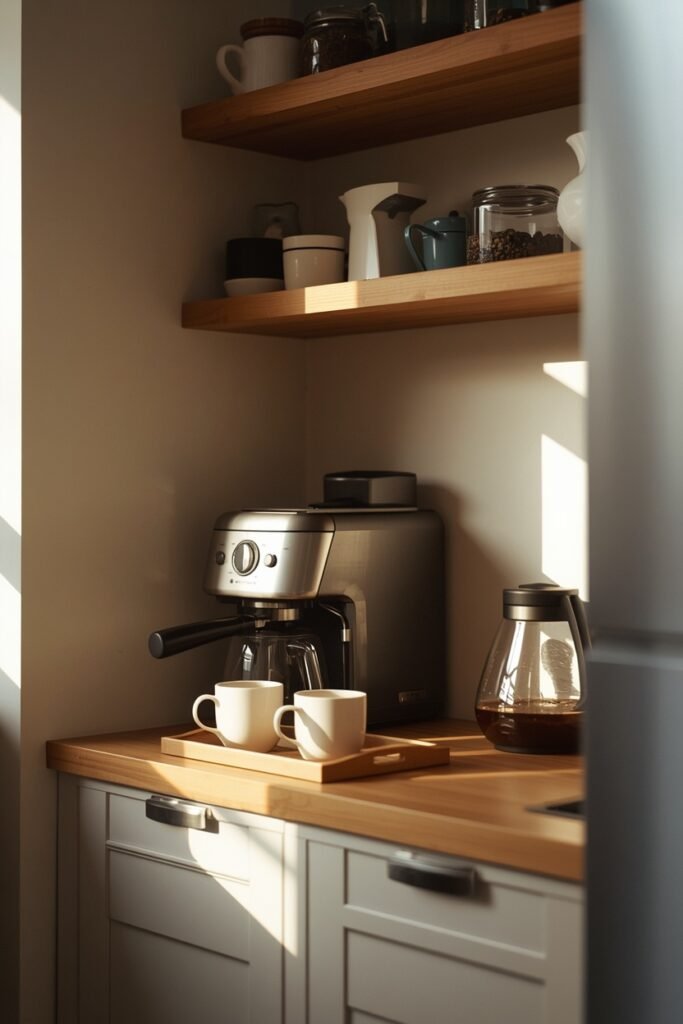
The coffee maker, mugs, spoons, and supplies are spread across the main prep zone, creating extra movement during busy mornings.
Daily drink supplies stay in one compact station, leaving the main cooking counter clearer and reducing crossover.
16. Give Everyday Dishes Their Own Easy Reach Cabinet
The plates and bowls used every day should not be stored behind serving platters, baking dishes, or things you only touch once a month.
Give everyday dishes a dedicated cabinet close to the dishwasher or sink so unloading takes fewer steps. If children help set the table, lower drawers can work even better than upper cupboards.
A simple setup is:
- Keep plates and bowls together.
- Store glasses in the next closest cabinet.
- Move special occasion pieces higher or farther away.
The goal is not to organize by category alone. It is to organize by how often you use something.
When daily dishes have a clear home, the kitchen is easier to reset after breakfast, dinner, and that one glass someone keeps leaving beside the sink.
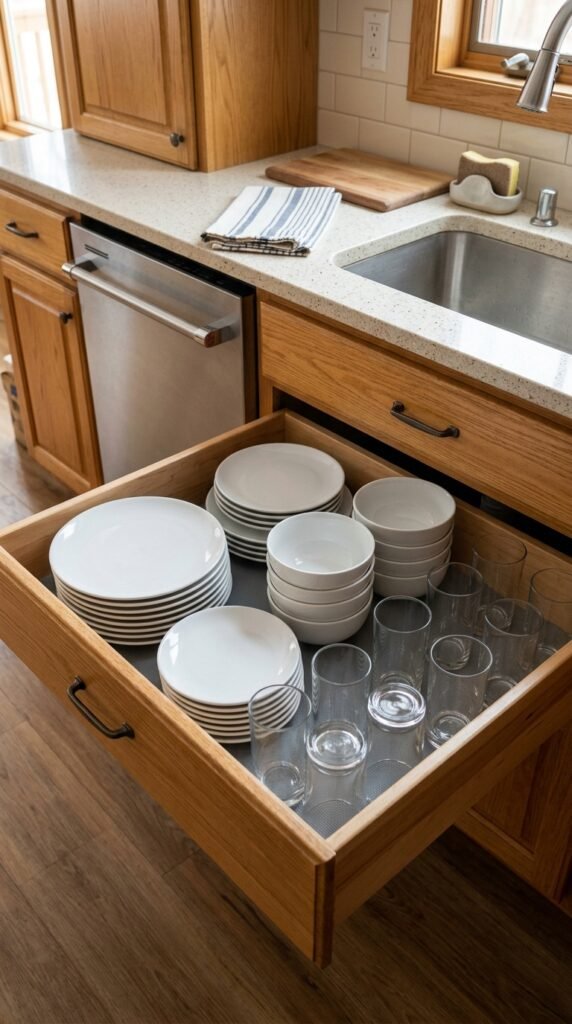
Put daily plates and bowls in the cabinet or drawer closest to the dishwasher.
Keep frequently used glasses and mugs in the next easiest spot.
Move rarely used dinnerware to higher shelves so it does not crowd the daily zone.
17. Add One Warm Wood Finish to Balance Painted Cabinets
A kitchen filled with painted cabinets, stone counters, metal appliances, and tile can start to feel a little hard.
One warm wood finish often softens the room without requiring a full design change.
It could be:
- A wood island
- Floating shelves
- Counter stools
- A chopping block
- A breakfast table
The trick is restraint.
Choose one main wood tone and repeat it in one or two smaller places instead of mixing several unrelated finishes. A medium oak shelf can connect nicely with stools in a similar tone, while a darker walnut island can carry most of the warmth by itself.
Natural variation in wood is fine. The goal is simply to make the repetition feel deliberate rather than accidental.
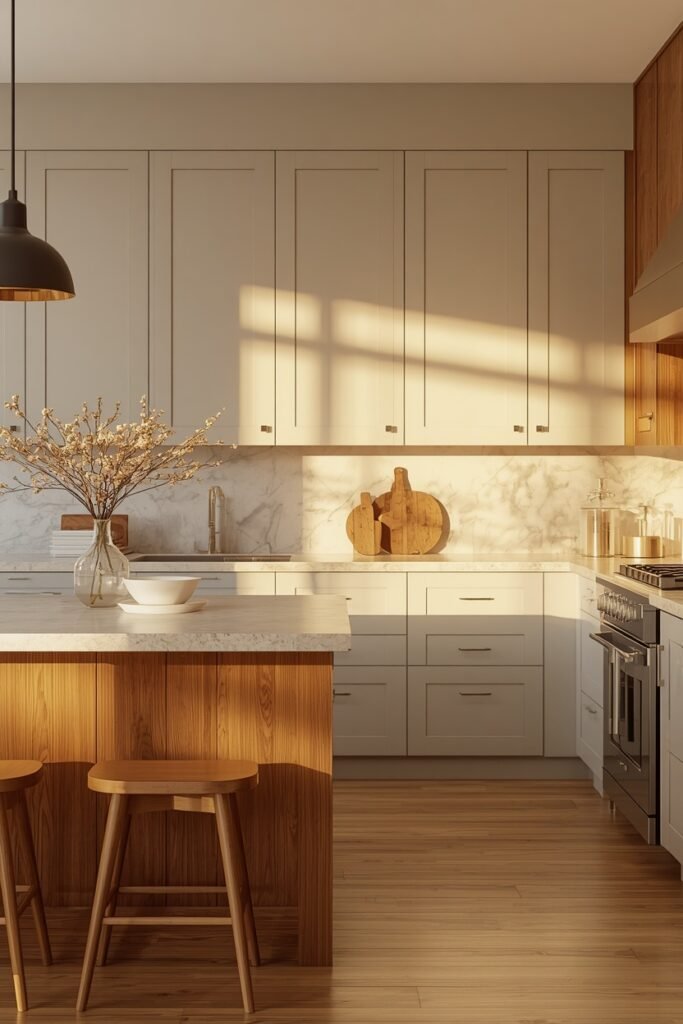
One repeated wood tone usually feels calmer than several different finishes competing across cabinets, stools, shelves, and furniture.
18. Use Glass Front Cabinets Only Where the Contents Stay Tidy
Glass cabinet doors can make upper storage feel lighter, but they also reveal everything behind them.
That works well for matching glasses, neatly stacked plates, or a small collection of serving pieces. It works less well for a cabinet full of mismatched snack boxes and half-used pantry bags.
Use glass strategically rather than across every upper cabinet.
A pair of glass fronts near the dining area can break up a long run of solid doors. Frosted or reeded glass offers more coverage if you like the lighter look but do not want every shelf fully visible.
Keep the most practical storage closed.
Glass is best where the contents already have some visual order without needing to be rearranged every time someone opens the door.
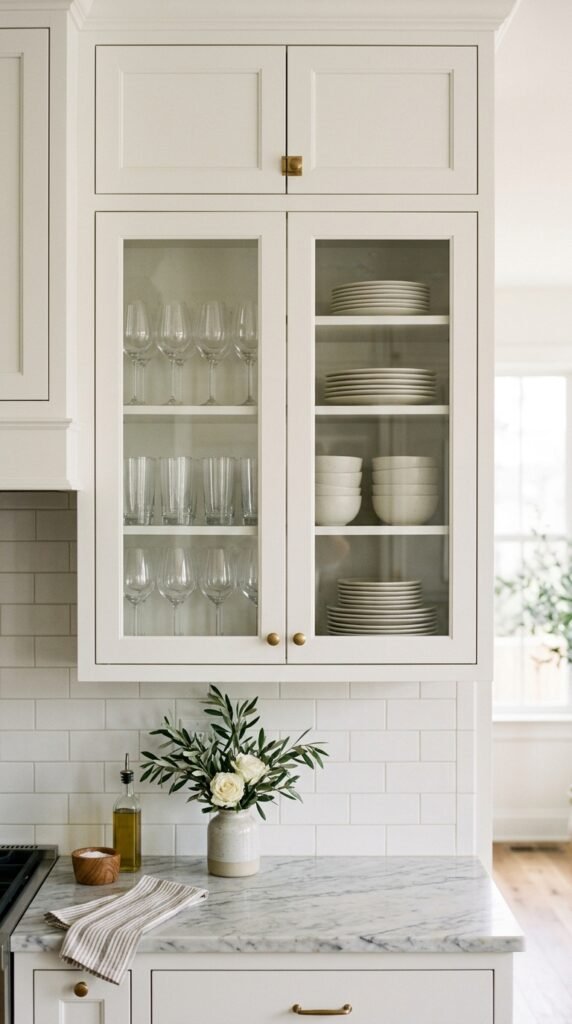
| Glass Front Works Well | Closed Door Works Better |
|---|---|
| Matching glasses and cups | Snack packets and pantry overflow |
| Neatly stacked serving dishes | Plastic containers and mixed lids |
| Display-worthy everyday pieces | Anything that changes constantly |
19. Build a Slim Landing Zone Beside the Refrigerator
Groceries need somewhere to land before they go into the fridge.
Without a nearby surface, bags often end up on the island or dining table, which creates extra movement and clutter. Even a short stretch of counter beside the refrigerator can solve that.
Use it for unpacking groceries, setting down a drink, or placing ingredients before cooking.
Keep this zone fairly empty.
A fruit bowl or small tray is fine, but avoid turning it into the home for mail, chargers, keys, and everything else that enters the kitchen.
If space is very tight, a shallow cabinet with a small counter above it can still create a useful pause point between the fridge and the rest of the room.
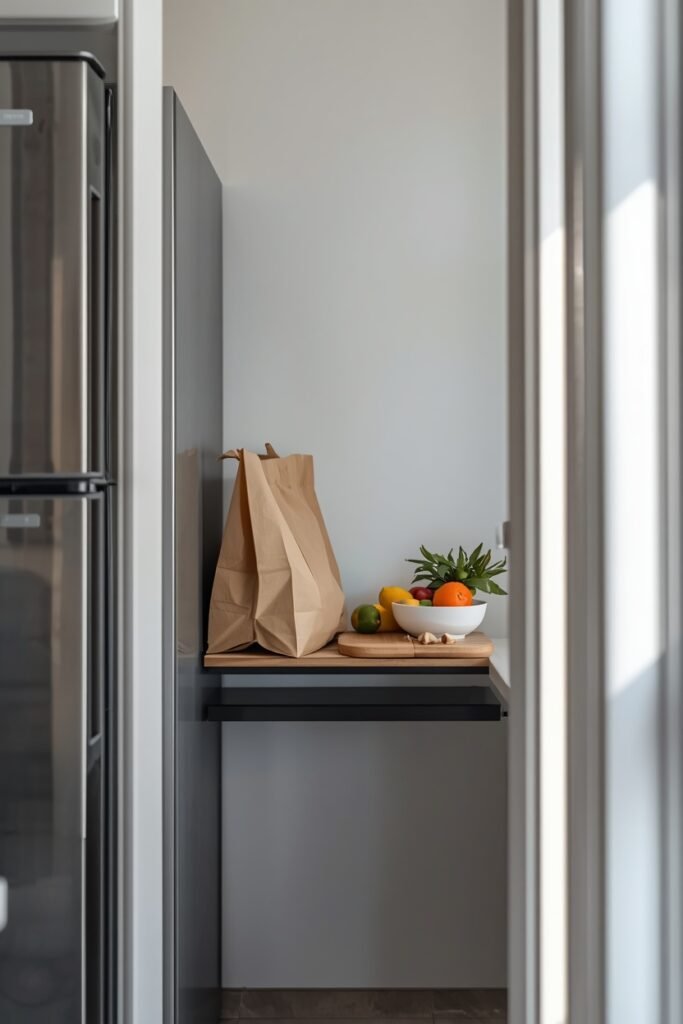
Keep a small clear surface close to the refrigerator for groceries and ingredients.
Use the cabinet below for fridge-related extras such as reusable bags or lunch containers.
Do not fill the landing zone with decorative objects that leave no usable counter.
Avoid letting it become the household drop spot for mail and keys.
20. Keep Countertop Decor in Small, Useful Groups
A kitchen counter can become cluttered surprisingly fast when every surface gets its own decorative object.
Instead of spreading things out, group a few useful pieces together.
Near the stove, that might be a small tray with oil, salt, and a utensil crock. Beside the sink, keep soap and a brush on one washable dish. In a coffee area, limit the visible setup to the machine and the few things used every morning.
Grouping creates breathing room between zones.
It also makes cleaning faster because you can move one tray instead of shifting five separate objects.
The best countertop styling still leaves obvious empty space. You should be able to put down a chopping board or grocery bag without first having to rearrange the room.
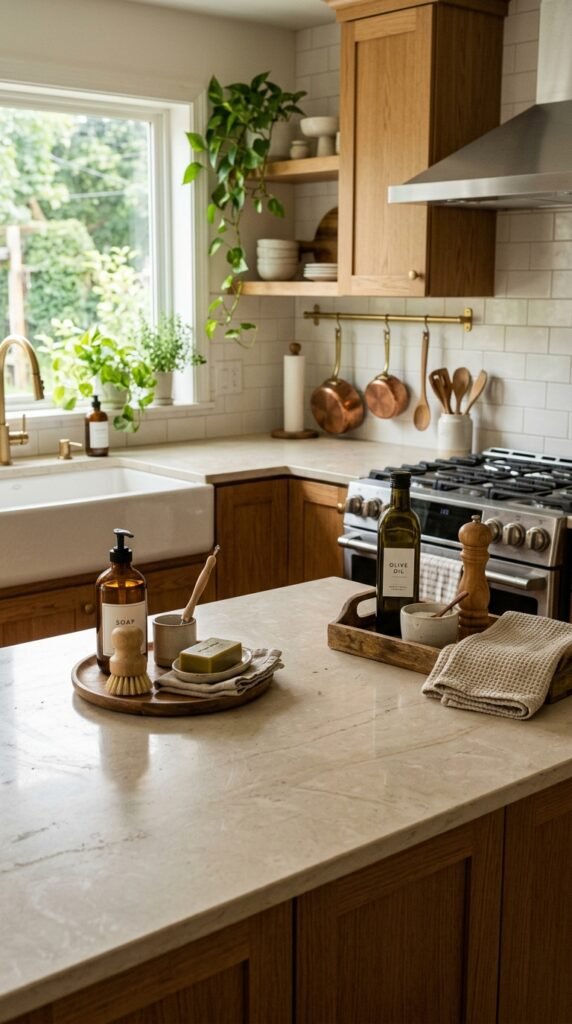
💡 Quick Tip
Keep each counter group tied to one task. Cooking items near the stove, washing items by the sink, and drink supplies near the coffee station. Empty counter between groups keeps the room looking calmer.
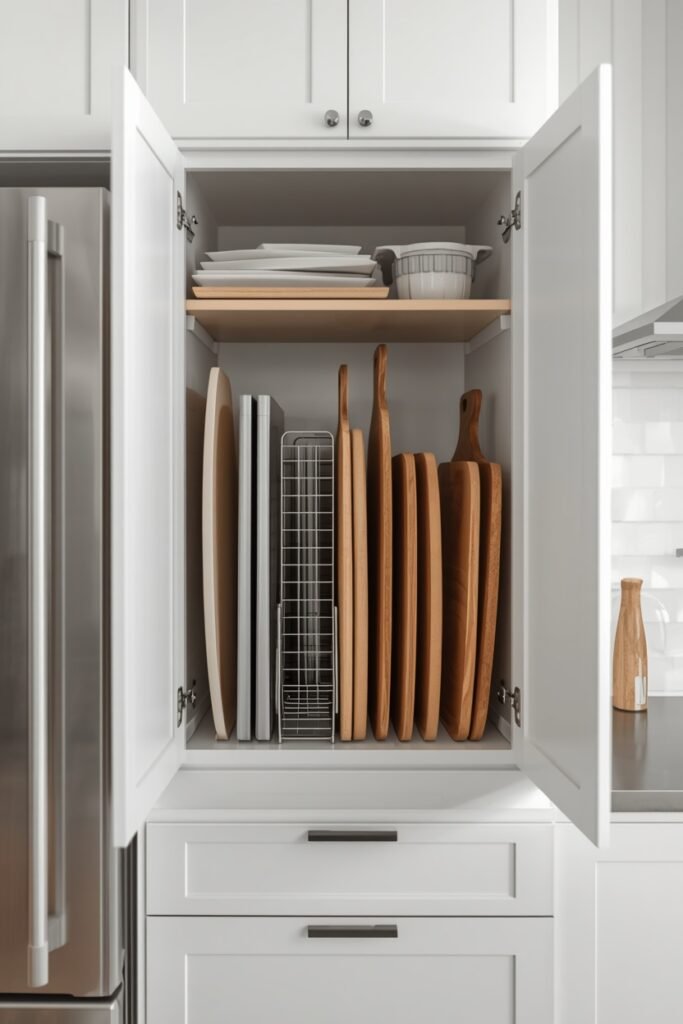
21. Add Vertical Tray Storage Above the Oven or Fridge
Flat baking sheets and chopping boards are much easier to grab when they are stored upright.
A narrow cabinet above the oven, refrigerator, or pantry can be divided vertically so trays, cooling racks, cutting boards, and serving boards each have their own slot. It keeps them from sliding into one heavy stack.
This works especially well for items that are awkward but relatively flat.
Use the slots for:
- Baking sheets
- Muffin tins
- Cooling racks
- Chopping boards
- Large serving boards
Keep the dividers wide enough that pieces slide in without catching. If the cabinet is high, reserve it for lighter trays rather than heavy stoneware.
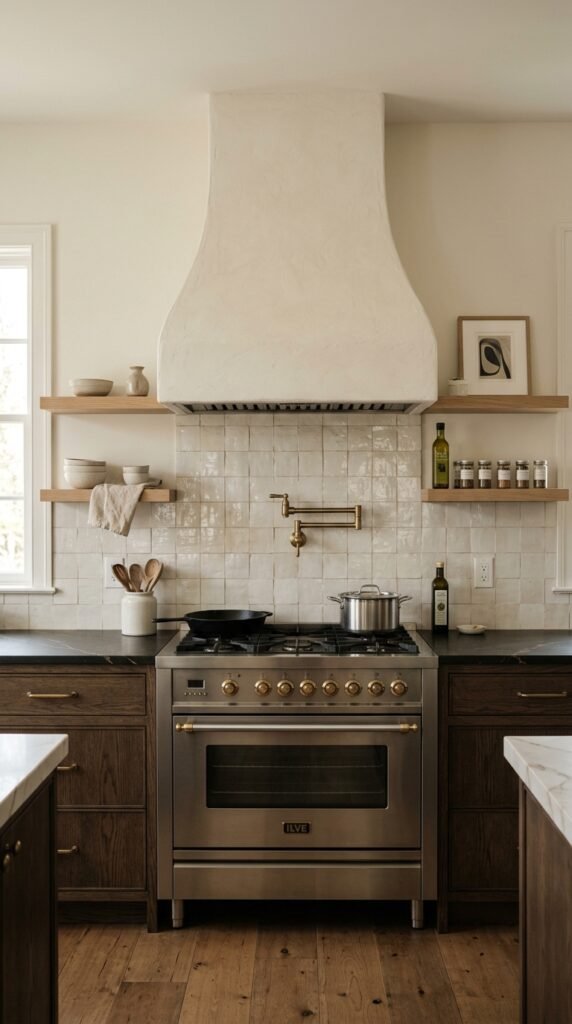
22. Use a Statement Range Hood Instead of Filling Every Wall With Cabinets
More cabinetry is not always the answer.
If storage is already covered elsewhere, leaving some breathing room around the range can make the kitchen feel less boxed in. A well-proportioned hood gives that wall a clear focal point without needing extra shelves or decorative clutter.
The hood can be quiet or bold.
Plaster, painted wood, metal, or a simple boxed shape can all work. What matters more is how it relates to the cabinets beside it.
Keep the surrounding area restrained so the hood has room to read.
A backsplash that continues behind it can help tie the whole section together without adding more visual noise.
Keep the range wall balanced
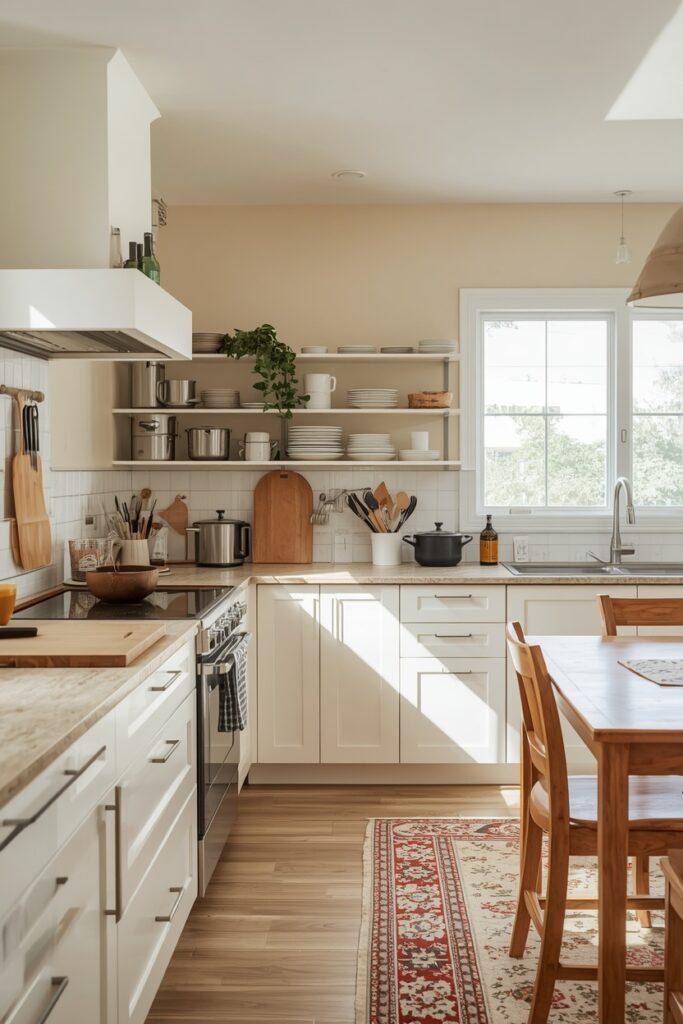
23. Create Separate Zones for Prep, Cooking, Cleaning, and Serving
A kitchen feels easier to use when every task has a natural place.
You do not need a huge room to create zones. Even a compact kitchen can work better when the chopping board, knives, and mixing bowls stay close together while dishes and cleaning supplies sit near the sink.
Think about the jobs you repeat most:
- Prep food
- Cook
- Wash up
- Make drinks
- Serve meals
Then store the tools for each job nearby.
A serving zone close to the dining area can be especially useful. Plates, napkins, and serving bowls do not need to compete with pans and cooking utensils.
The point is fewer unnecessary trips across the room.
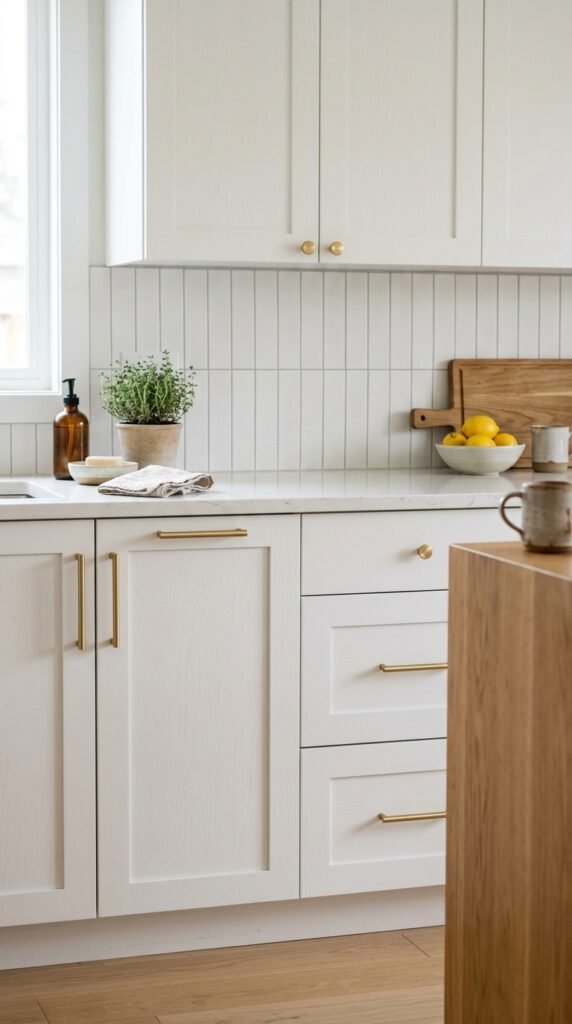
24. Choose Hardware That Gives Plain Cabinets More Definition
Simple cabinet fronts can change a lot depending on the hardware placed on them.
Long pulls make drawers feel more structured. Small knobs keep traditional cabinetry lighter. Slim bar handles work well when you want something understated.
Do not choose hardware from a tiny sample alone.
Tape a paper template or temporary handle onto the actual door and look at it from across the kitchen. Scale can feel completely different once the hardware sits on a full cabinet run.
Also think about how it feels in your hand.
A beautiful pull with sharp corners can become annoying on a drawer opened twenty times a day.
Choose one main hardware finish and repeat it consistently unless there is a clear reason to mix.
| Knobs | Pulls |
|---|---|
| Visually lighter on small doors | Easy to grip on wide drawers |
| Works well on classic cabinet styles | Adds stronger horizontal or vertical lines |
| Good for lighter visual detail | Useful where a firm grip matters most |
25. Add a Small Herb or Produce Spot Near a Bright Window
A kitchen feels more lived in when a little fresh greenery is part of the working space.
Use a bright windowsill or nearby counter for a small herb pot, bowl of lemons, garlic basket, or produce you actually reach for during the week.
Keep it modest.
A few useful items look more natural than turning the window into a crowded display. Herbs such as basil, parsley, or mint can work well where light conditions suit them, while a simple fruit bowl adds color without creating another decorative project.
Choose containers that are easy to wipe and move.
If the spot is directly beside the sink, leave enough room that water does not constantly splash the pots or basket.
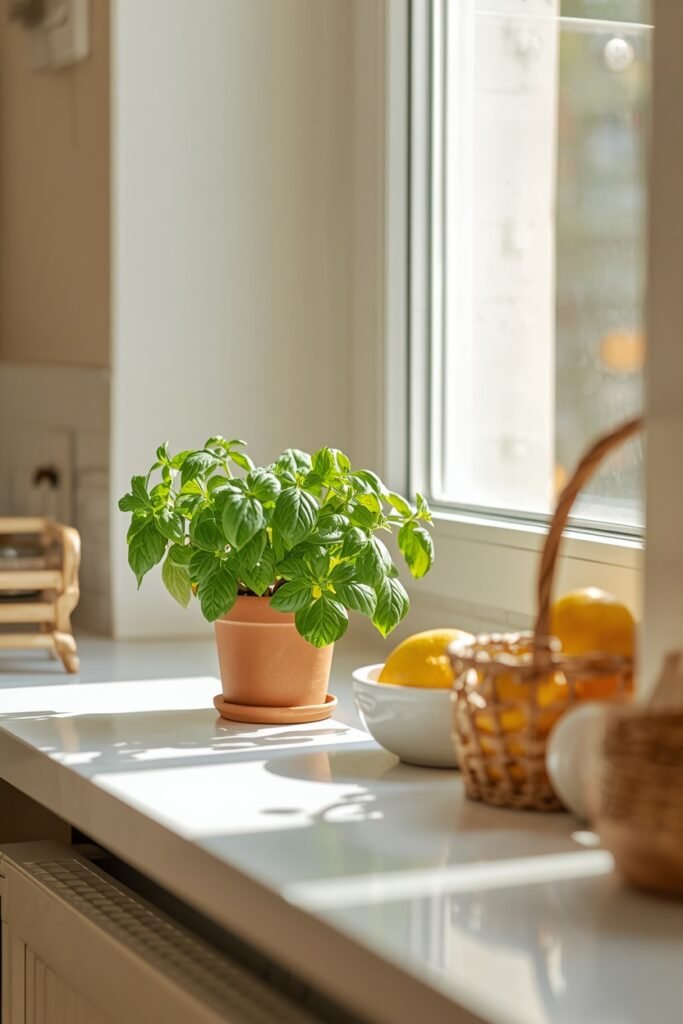
Keep the window spot useful. A small herb pot or bowl of produce feels more natural than a crowded collection of decorative pieces.
26. Use a Freestanding Cart When a Built In Island Will Not Fit
A small kitchen does not always need a permanent island.
A freestanding cart can add prep space and storage without closing off the room. It works especially well in kitchens where the center needs to stay flexible or where a built in island would make the walkway too tight.
Look for a cart with:
- A solid top for light prep
- One or two useful shelves
- Locking wheels if it moves often
- A footprint that still leaves clear walking space
The nice part is flexibility. You can pull it closer while cooking, then move it aside when the kitchen gets busy.
Choose storage based on what you actually use. Mixing bowls, produce baskets, and small appliances make more sense than filling the shelves with decorative pieces.
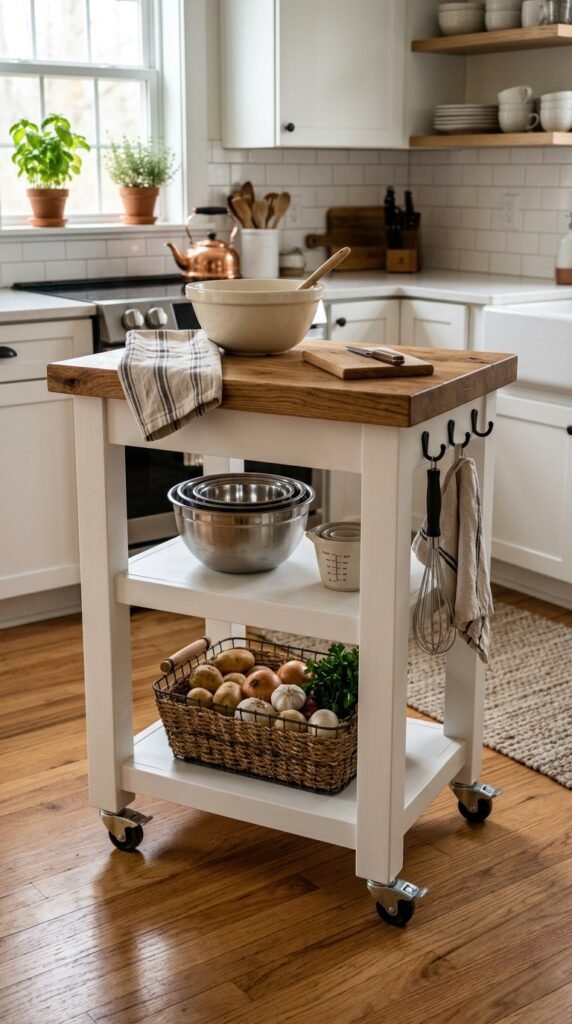
Mark the cart size on the floor with tape before buying so you can check the remaining walkway.
Decide whether you need more prep surface, storage, or both before choosing the shelf layout.
Keep the top mostly clear so the cart stays useful instead of becoming another storage surface.
27. Finish the Kitchen With One Consistent Material or Color Thread
A kitchen can have several finishes and still feel pulled together.
The easiest way to do that is to repeat one material, tone, or color in a few places across the room. It could be warm wood, brushed brass, black metal, cream stone, or even one muted cabinet color.
The repetition does not need to match exactly.
A wood stool can echo a wood shelf. A dark faucet can relate to dark pendant lights. A warm cabinet color can show up again in the runner or pottery.
What matters is that the eye finds a few quiet connections.
This is especially useful when the kitchen already has several fixed finishes and you do not want to replace them. A repeated thread can make the whole room feel more intentional without making everything identical.
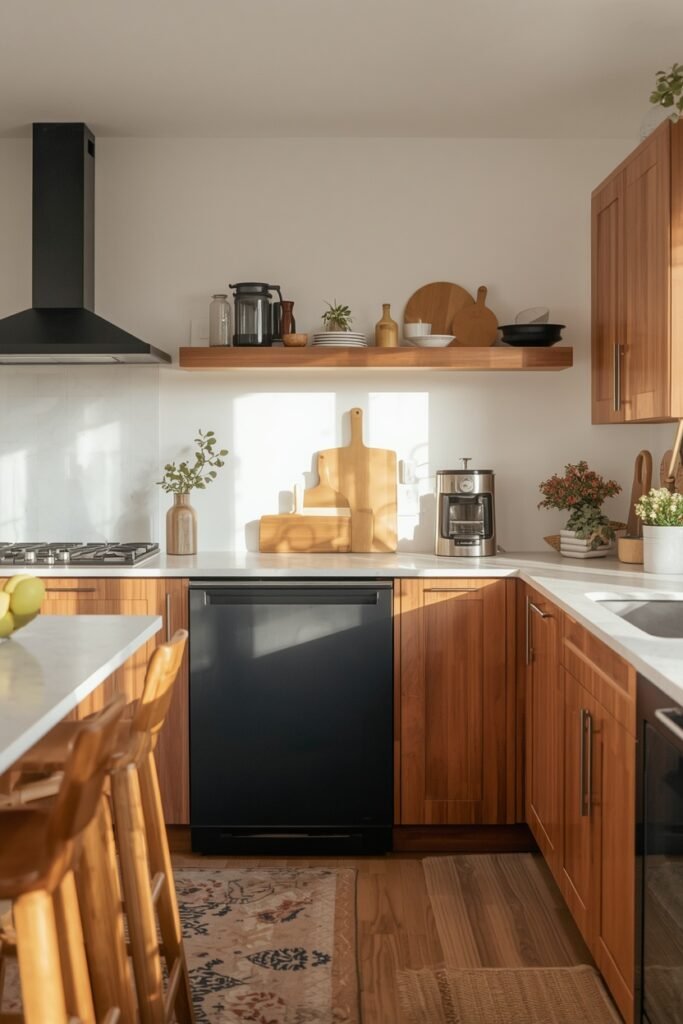
Hardware, stools, lights, wood tones, and accessories all feel unrelated, so the room reads as several separate choices.
One repeated tone or material appears in a few places, helping different parts of the kitchen feel connected without matching everything.
Conclusion
A kitchen feels best when it looks good and makes everyday tasks easier at the same time. The strongest kitchen ideas for a stylish and functional space are often the ones that solve small frustrations, like crowded counters, awkward storage, poor lighting, or wasted corners.
You do not need to use all 27 ideas. Start with the parts of your kitchen that slow you down most, then choose a few changes that fit your space, budget, and routine. Even one better drawer, clearer work zone, or more useful stretch of counter can make the room easier to live with.
Save this list on Pinterest so you can come back to it when you are ready to plan your next kitchen refresh.